Contact TMA Technical Support atsupport@tmasystems.com, if you have any questions.
Requestor Login Status Browse Enhanced |
|
|
Path: Request Status Browse
|
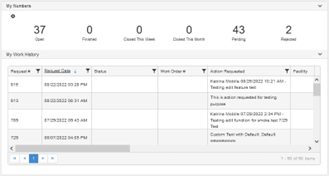
Summary: The Requestor Login Status window has been redesigned with dashboard features that make it easier to use and more informative. Discussion: The new design has only two Sections. The upper Section, My Numbers, shows values for the options of your choice. You make the selections when you choose the gear icon at the upper left. Select a value of interest to view a flyout that shows each item. Buttons at the bottom of the flyout allow you to export to Excel. The My Work History Section is made up of a number of columns that can be sorted using the standard ascending/descending or filtered using the filter icon for specific searches. More columns may be added in the future. NOTE: System Administrators have the option to add or remove controls in My Numbers or columns in My Work History using System Form Attributes. |
GIS Map View Added |
|
|
Path: File > GIS Map View
|
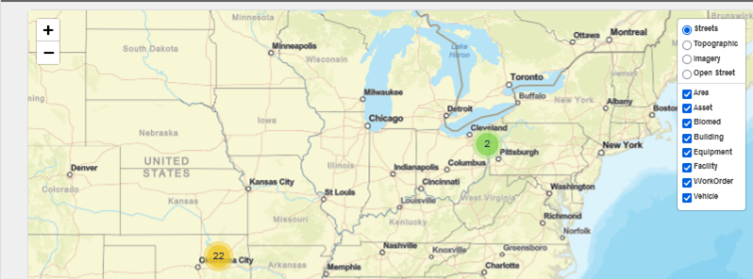
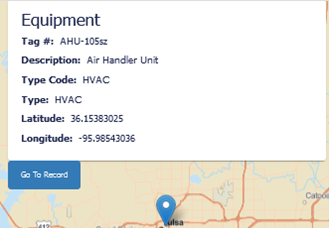
Summary: The new optional GIS module is a search tool to visualize your work orders and maintenance-worthy items on a map. Discussion: If your data is in a specific area, such as a city, the map zooms to that area when it opens. By default, you see a Street view that includes records for Area, Asset, Biomed, Building Equipment, Facility, Work Order, and Vehicle. You have the option to clear some check boxes to filter the number of records represented or to change the view. The different views (Street, Topographic, etc.) stem from the underlying Esri mapping software. The various colored circles with values give you at-a-glance understanding of how many markers make up a cluster on the map. Green is a lower number and moves up to yellow or red. Select a circle to see the markers. Choose the markers to view underlying information such as a list of work orders or an item record. On the work order list, click a line to open the record. For items or locations, click the Go To Record tab. Note that the location or item records require entries for Latitude and Longitude to display on the map. |
Added Ability to Import Latitude & Longitude Fields for MWI |
|
|
Path: Organization > Asset > Records Path: Organization > Biomed > Records Path: Organization > Entity Path: Organization > Equipment > Records Path: Material > Tools > Records
|
Summary: To support the new GIS module, Longitude and Latitude fields are now available in the Export Template for import from the core maintenance worthy item windows. Discussion: You can now mass load Latitude and Longitude information that allows you to view the location of maintenance worthy items on the graphical maps. which are available in the system. The Export Template Excel file now includes columns for Longitude and Latitude. The new columns are available from the following windows: • Asset • Biomed • Entity • Equipment • Tools |
Service Request Form Has New Selectable Field |
|
|
Path: Admin > Form Attributes > Service Request Form / Layout Tab
|
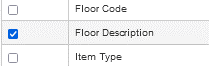
Summary: Floor Description has been added to the Layout Fields flyout. Discussion: As you edit or create a Request Form, a new field, Floor Description, is now available on the Layout Fields flyout. |
Keys Access Tab and Keys Related to Locks |
|
|
Path: Material > Key Management > Keys / Access Tab
|
Summary: Keys that are added to Lock window records display on the Keys / Access Tab. Discussion: When you delete the Key from the Lock window, the Key is removed from the Keys / Access Tab as well. |
Executive Dashboard Digital and Dial Icons |
|
|
Path:My Dashboard
|
Summary: Icons are easy to add or remove from the display. They provide at-a-glance signifiers about the control. Discussion: When you choose the Icons are removed just as easily. Simply select the |
 red cancel icon at the upper left of the first drop-down page of icons.