WebTMA GO Path: Main Menu > Work Orders > Work Order Queue
Work Orders that fit a logged-in Technician's profile are listed on the Work Order Queue window. This is work that has not been assigned, but the Technician matches requirements established by the System Administrator.
-
Tap Work Order Queue on the Work Order menu to open the Work Order Queue window.
-
Tap the Refresh
 icon to populate the window with a list of Work Orders assigned to your Trade or Trades.
Tap any line of interest to see details about the Work Order. If desired, assign the Work Order to yourself by tapping the Assign to Myself check box.
Advanced Search and Filter Options
Once you have tapped the Refresh ![]() icon and populated the grid, you can select a Trade in the Trade field to reduce the size of the list.
icon and populated the grid, you can select a Trade in the Trade field to reduce the size of the list.
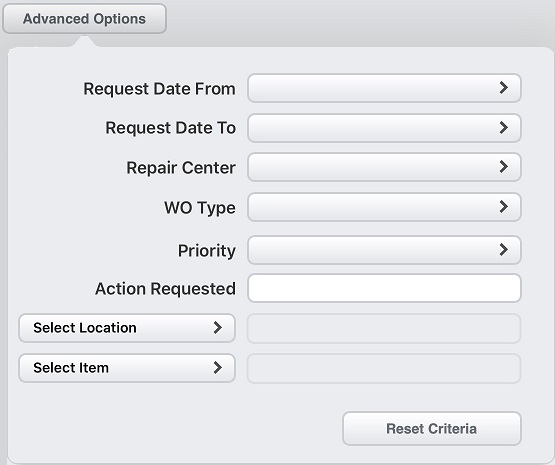
You can also tap the Advanced Options button to set a search query to help locate Work Orders of interest. If needed, tap the Reset Criteria button on the drop-down window to clear your selections and start over.

On the Work Order Queue window, the Assigned field is also color highlighted by priority if your organization uses this feature.
How to Use Work Order Queue Window
The primary Work Order Queue window is clear until you refresh the data to populate it.
To review an unassigned Work Order and self-assign:
-
Scroll through the list of unassigned Work Orders.
-
Tap a line to review a Work Order.
-
Tap the Assign To Myself check box at the lower left of the window if you want to perform the work. The window automatically extends to display more fields.
-
Select a Trade in the additional fields that display.
-
Accept or complete the other fields as needed.
-
Tap Save at the upper right of the window.
The line remains on the Work Order Queue window and shows ‘Y’ in the Assigned column. If you re-select the line, all fields are read-only.
To perform the work, go to the Work Order window where the newly assigned Work Order is marked with a blue sphere. This indicates the Work Order has not been viewed by the Technician from the Work Order window.
Want to Learn More?
Visit the WebTMA Help Page