Path: Transactions > Work Order > Records / Schedule Tab
Use the default Schedule Subtab on this window to assign work to technicians or crews and convert line items to a labor line (shown on the Cost and Billing Info Tabs). The Allocated Part, Allocated Tool, and Required Resources/Parts Subtabs on the window relate to those items that have been designated for the work order.
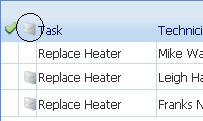
Line items converted to labor from this window are indicated by a green check mark  for each line converted.
You can automatically e-mail a notice of the assignment to technicians when the work order is saved if the following conditions are met:
- the technician has an e-mail address in his record (Organization > Repair Center > Technician / Identity Tab)
- your organization has marked the Auto Notify Technician (Scheduled Task) option in Admin > Client Info / Preferences
How to Add a WO Schedule
Path: Transactions > Work Order > Records / Schedule Tab
To assign work to a technician or crew from the Work Order window:
- Click the Schedule Tab.
- Click Edit on the WebTMA toolbar.
- Click the Add Schedule link at the top of the grid. The Schedule Entry window opens.
- Complete the Schedule Entry window.* If you have assigned a default global technician from File > Personal Info / Defaults or from Admin > User Management > Records / Defaults, WebTMA automatically populates the default technician. See note below about adding Crews.
- (Optional) Click Save & Add on the Save button selection menu to include more schedules.
- Click Save & Close when you are finished.
- Click Save on the WebTMA toolbar.
* The View button adjacent to the technician's name field gives you a quick look at any other work orders scheduled to the selected technician that might conflict.
NOTE: To make Crew assignments, select Crew in the default Technician field. All members of the crew you select are automatically added to the Schedule Tab. WebTMA checks to assure all crew members have met any Task training requirements and a warning pops up if training is needed.
How to Edit a WO Schedule
Path: Transactions > Work Order > Records / Schedule Tab
To change a technician assignment or other information from the Work Order window:
- Click the Schedule Tab.
- Click Edit on the WebTMA toolbar.
- Double-click the line item you wish to edit. This opens the Schedule Entry window.
- Make desired changes to fields on the Schedule Entry window.
- Select Save & Close from the Save button on the popup window.
- Click Save on the WebTMA toolbar.
![]() Avoid editing converted schedule line items. If you change hours on a converted line item, WebTMA does not update the new value on the Costs Tab, but if you re-convert the line item, WebTMA adds a new line item to the Costs. This means you have two cost line items for the same labor line. For example, suppose you have a converted line item with a quantity of 3 hours and you update the quantity to 4 hours. If you click the Convert to Labor link, WebTMA adds an additional line with a quantity of 4 hours (for a cumulative total of 7 hours).
Avoid editing converted schedule line items. If you change hours on a converted line item, WebTMA does not update the new value on the Costs Tab, but if you re-convert the line item, WebTMA adds a new line item to the Costs. This means you have two cost line items for the same labor line. For example, suppose you have a converted line item with a quantity of 3 hours and you update the quantity to 4 hours. If you click the Convert to Labor link, WebTMA adds an additional line with a quantity of 4 hours (for a cumulative total of 7 hours).
How to E-mail Work to Technician
Path: Transactions > Work Order > Records / Schedule Tab
The following conditions must be met to e-mail assignments:
- the technicians have an e-mail address in Organization > Repair Center > Technician / Identity Tab
- your organization has marked the Auto Notify Technician (Scheduled Task) option in Admin > Client Info / Preferences
E-mail icons ![]() are visible once you save the work order if the Technician record includes information in the Work E-mail, the Cell Service, or Work Pager fields. An e-mail icon displays for both line items and in the header as illustrated below. Send messages individually, or if multiple technicians are scheduled, use the instructions below to select several addresses at one time.
are visible once you save the work order if the Technician record includes information in the Work E-mail, the Cell Service, or Work Pager fields. An e-mail icon displays for both line items and in the header as illustrated below. Send messages individually, or if multiple technicians are scheduled, use the instructions below to select several addresses at one time.

To select addresses for multiple technicians:
- Click the e-mail
 icon in the header. Any available information is displayed in the Select E-mail window.
 - Mark the check boxes of the desired addresses displayed.
- Click OK on the Select E-mail window.
The Send E-mail window shows all the selected addresses in the To field and basic details about the work. You can edit any text or addresses on the window before you click the Send button.